Pixel-perfect multi-DPI images in WPF (part 2)

View source on GitHub.

See also: Part 1 and Part 3.

In Part 1 of this series, I explored the issue of displaying pixel-perfect bitmap images in the Windows Presentation Foundation. In this article, I’ll describe a method of displaying different images depending on the system DPI setting using a custom Markup Extension and multi-image TIFF files.

Tagged Image File Format (TIFF) files may contain multiple images, and WPF contains support for this format out of the box. You can use the TiffBitmapEncoder class to combine multiple images into one TIFF – I made a tool called PNGToMultiDPITIFF that does just this, but I’ll leave that to Part 3.

To pick the best-matching image from a multi-frame TIFF, I created two Markup Extensions – one for creating an ImageSource, and one for setting the image’s BitmapScalingMode. If the TIFF contains an exact match for the current DPI, the BitmapScalingMode can be set to NearestNeighbour (as there should be no scaling). If not, it will be set to Unspecified (which means Linear in WPF 4 or newer) so it looks better.

MultiDPIImage.7z
1,229 bytes; SHA-1: BB0B8867C48ECEADD7655E792DAA780A30299747

You can download the code for the Markup Extensions above.

<Image Source="{local:MultiDPIImageSource 'MultiDPIImage.tif'}" RenderOptions.BitmapScalingMode="{local:MultiDPIImageScalingMode 'MultiDPIImage.tif'}" />

As discussed in the previous post, remember to set UseLayoutRounding and SnapToDevicePixels to true on your Windows.

Code discussion

The code for the markup extension is quite simple. To get the image frames, we use the TiffBitmapDecoder class:

TiffBitmapDecoder decoder = new TiffBitmapDecoder(this.imageuri, BitmapCreateOptions.None, BitmapCacheOption.Default);

We loop through the frames to see if any match the system DPI. If there is no exact match, the first frame with a DPI above the system DPI is selected. If there is no such frame, we just pick the frame with the highest DPI.

SortedList<int, BitmapFrame> sortedframes = new SortedList<int, BitmapFrame>();
foreach (BitmapFrame frame in frames)
    if (!sortedframes.ContainsKey(GetDPI(frame.DpiX, frame.DpiY)))
        sortedframes.Add(GetDPI(frame.DpiX, frame.DpiY), frame);
foreach (var frame in sortedframes)
{
    if (frame.Key == DPI)
        return frame.Value;
    if (DPI < frame.Key)
        return frame.Value;
}
return sortedframes.Last().Value;

The code for choosing the BitmapScalingMode is similar – instead of returning an image, we return NearestNeighbour if there is an exact DPI match or Unspecified otherwise. If you want to use a different BitmapScalingMode fallback, you can specify an optional second paramater in MultiDPIImageScalingMode:

<Image Source="{local:MultiDPIImageSource 'MultiDPIImage.tif'}" RenderOptions.BitmapScalingMode="{local:MultiDPIImageScalingMode 'MultiDPIImage.tif', Fant}" />

Drawbacks

  • Images set with the markup extension will not be visible in the WPF designer (Visual Studio or Blend). I’d welcome any suggestions on how to fix this.
  • Avoid using PNGOUT or PNGGauntlet on PNG images before putting them into multi-frame TIFF files. The Windows TIFF decoder has some issues with compressed PNGs.

Pixel-perfect multi-DPI images in WPF (part 1)

View source on GitHub.

See also: Part 2 and Part 3.

I’ve written previously about DPI-awareness in the Windows Presentation Foundation and how to specify measurements in pixels rather than Device Independent Units (DIUs). Something else to consider is image scaling – unlike the Windows Ribbon control or WinRT, WPF has no in-built mechanism for displaying different images according to the system’s DPI setting. This is a nuisance.

To illustrate the problem, I created 5 images. Left-to-right, the image DPIs (vertical and horizontal) are: 72, 96, 120, 144 and 192. The image dimensions are: 32x32px, 32x32px, 40x40px, 48x48px and 64x64px. I purposely used single-pixel-wide lines to make any stretching obvious.

Original Images

Read on to see what WPF does with these images.

Continue reading “Pixel-perfect multi-DPI images in WPF (part 1)”

P/Invoke and ChooseFont (Comdlg32.dll)

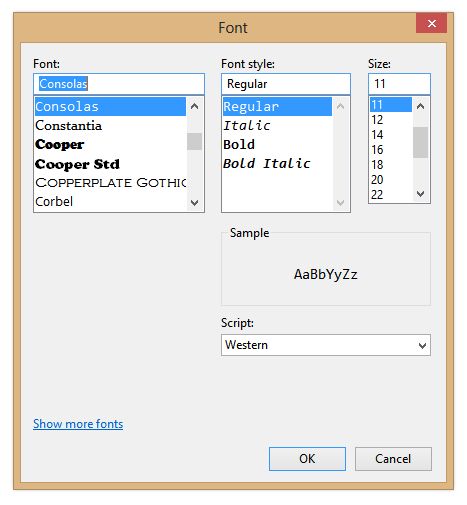
Mister Goodcat wrote a good article a little while ago about using P/Invoke in Silverlight 5 to display the native font chooser dialog with the ChooseFont function. I couldn’t get the code working for a 64-bit executable, however, as the definition of the CHOOSEFONT structure on MSDN he used as a basis for the managed implementation doesn’t match with what’s in the Windows SDK. I’ve created a page on PInvoke.net for the function that includes a definition of CHOOSEFONT that works in both 32-bit and 64-bit versions of Windows.

Screenshot of Font Chooser Dialog

Retrieving Windows 8 theme colours

See also: Windows 8 Theme Colours Reference.

Windows 8 doesn’t offer developers access to system theme colours, unlike its cousin, Windows Phone. Even for a version 1 product, this seems like a strange omission. Then again, we still don’t have a working public API for retrieving the Aero glass colour (or whatever we call it now that Aero’s gone) 6 years after the release of Windows Vista.

The functions that the system uses to retrieve colours are defined in UxTheme.dll. In particular, we’re interested in GetImmersiveColorSetCount (export #94), GetImmersiveColorFromColorSetEx (export #95), GetImmersiveColorTypeFromName (export #96), GetImmersiveUserColorSetPreference (export #98) and GetImmersiveColorNamedTypeByIndex (export #100). Relying on undocumented functions is a bad idea, and will cause your program to fail certification, so you won’t be able to use them in apps distributed through the Windows Store anyway.

For desktop developers who still want to use these functions, read on. Just assume that they’ll break in future versions of Windows (or even with patches to Windows 8).

Screenshot of Windows 8 Colours
Continue reading “Retrieving Windows 8 theme colours”

Keiki Usage Meter 3.1.0 released

I’ve released an update for Keiki Usage Meter. There has been a lot of behind-the-scenes work, but the user experience hasn’t changed drastically. Visit the website to find out what’s new.

I’m using this program as something of a testbed for some engineering work that I’ll talk about in future posts, including supporting pixel-perfect bitmap images at multiple DPI settings in WPF and using the Visual Styles APIs to draw native-looking controls (with animation). I’ve also taken the opportunity to learn a bit about localising programs, and v3.1.0 contains three user interface languages: English (Australia), English (United States) and Japanese (Japan) – thanks to Miho Inaba (稲葉美穂) for help with the latter.

WPF: Using system colours in animations

WPF provides access to the Windows system colours through the System.Windows.SystemColors class. As the MSDN documentation indicates, it’s possible to bind to these colours dynamically using the *Key resources, so when the system colours change, so will the appearance of your application.

Continue reading “WPF: Using system colours in animations”

Drawing non-themed push buttons in Windows

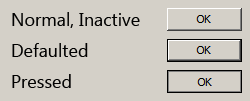
When visual styles are enabled in Windows, one may use the DrawThemeBackground function to draw themed push buttons. However, users of Windows XP, Windows Vista and Windows 7 can disable visual styles by selecting the Windows Classic theme or one of the High Contrast themes (and in Windows 2000 and earlier, visual styles weren’t available at all). The classic theming mode has been removed in Windows 8 (I have written about this previously), so in that OS the visual styles APIs should always be available. I suspect it will be a long time before NT6.1 and earlier versions of Windows constitute an insignificant share of the market, though, so this post should be useful until then.Screenshot of Non-Themed Buttons

Continue reading “Drawing non-themed push buttons in Windows”